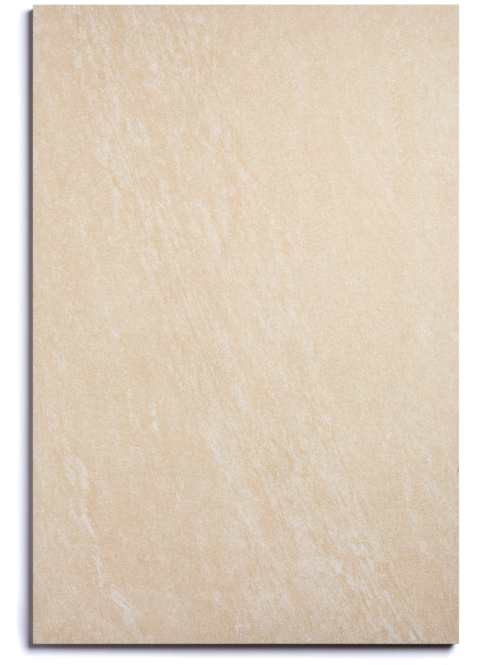
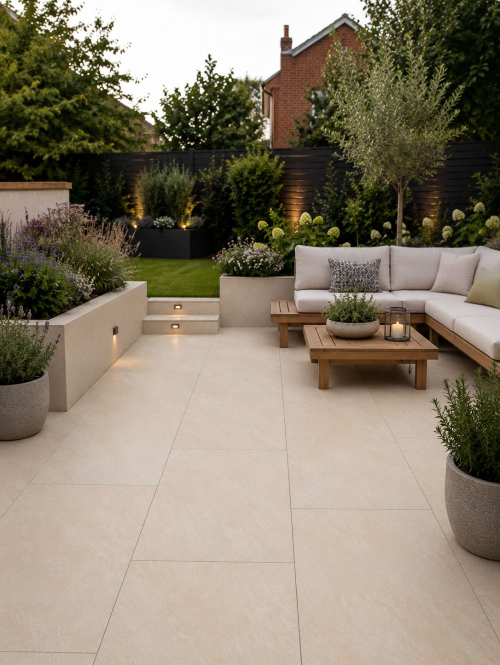
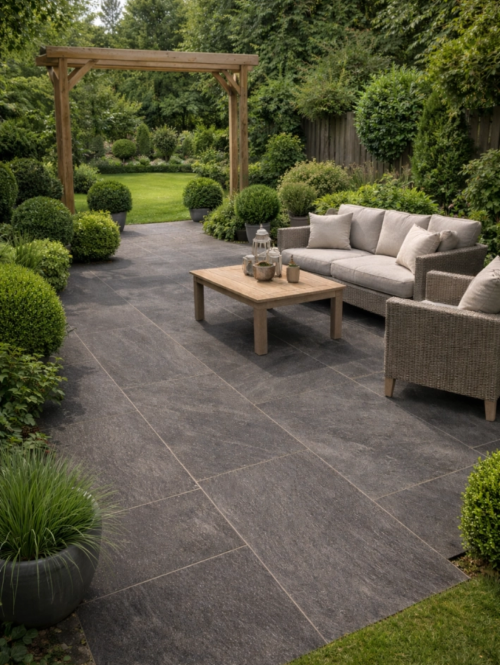
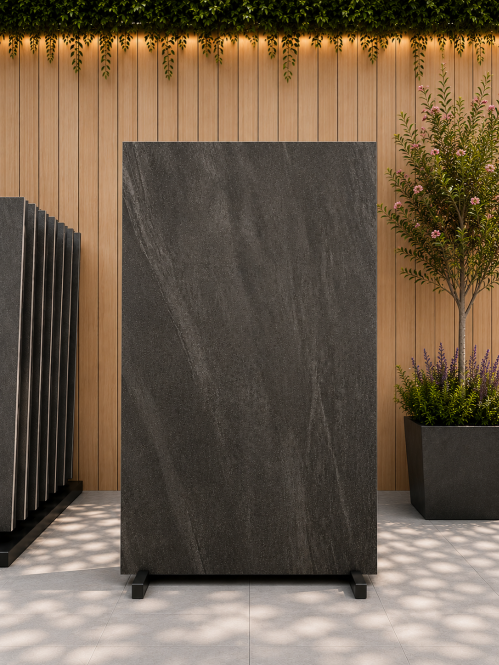
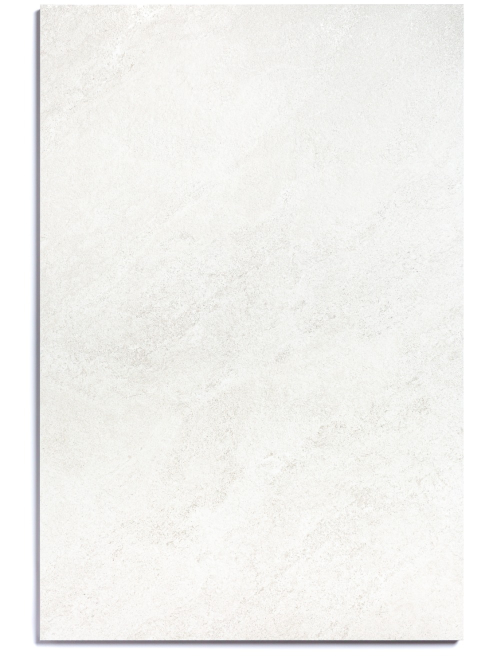
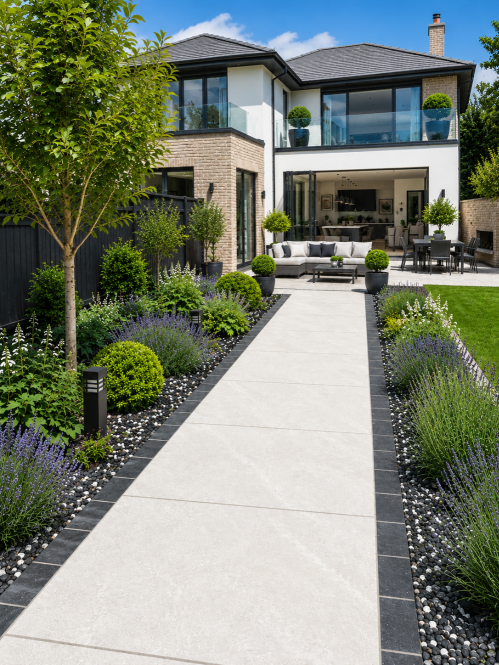
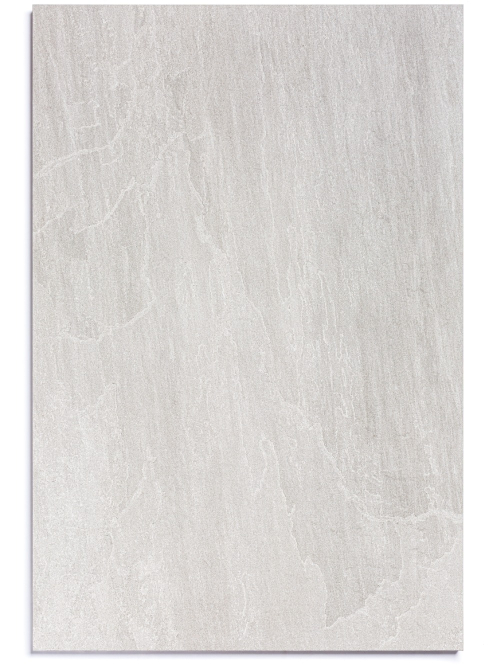
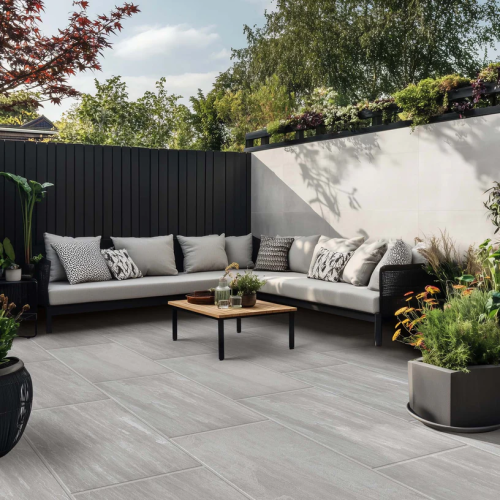
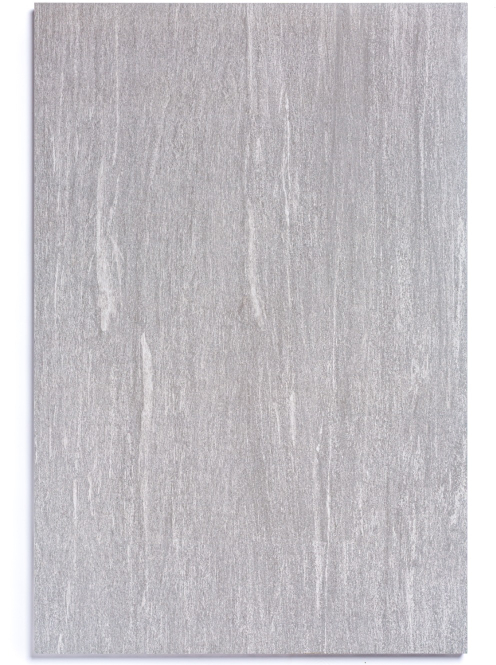
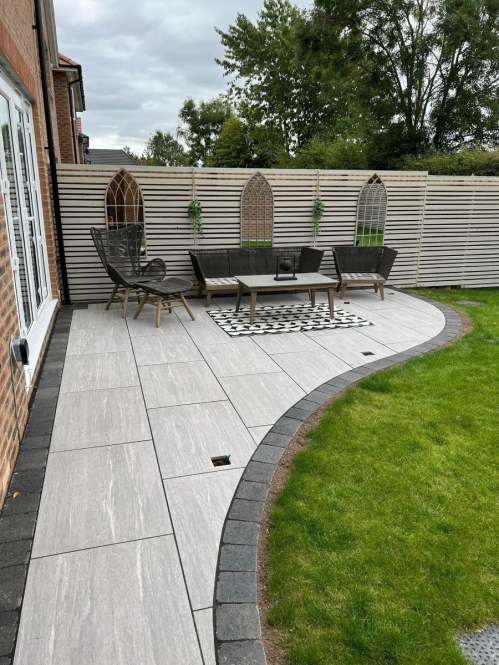
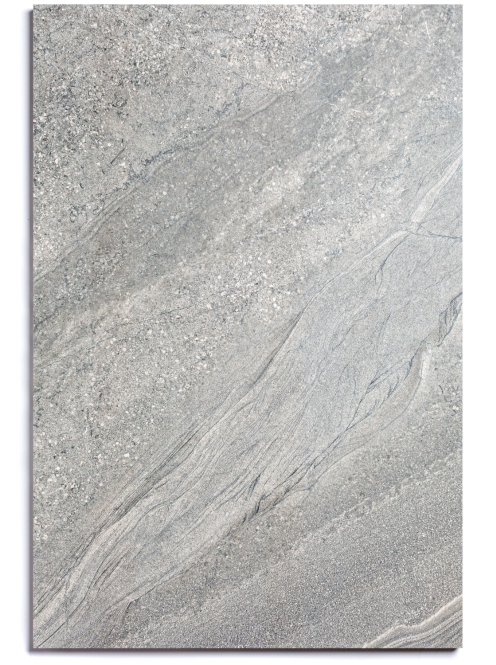
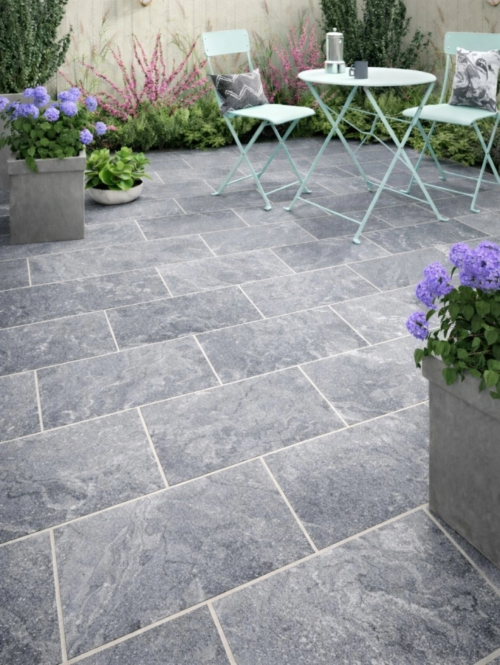
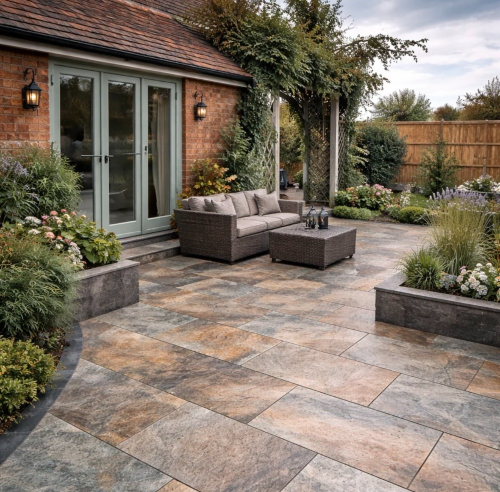
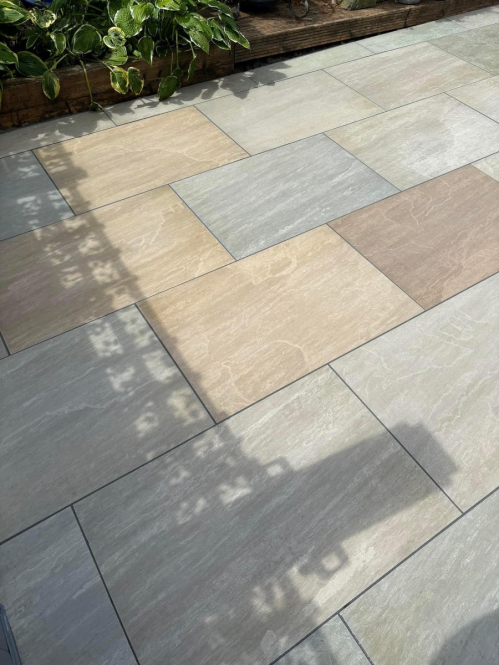
600x900mm Porcelain Paving
600x900mm Outdoor Porcelain Paving slabs are the most popular size slabs in the UK today. This is due to the laying pattern used in a brick bond, stretcher course brick pattern. Most 600x900mm porcelain pavers are lifted by two men/women during the installation due to the large size. We have many porcelain paving colours available that include black, grey, anthracite, buff and beige meaning you are sure to find a stunning porcelain paving of your choice for your garden. Easy to keep clean and maintain 600x900 porcelain paving slabs are an excellent choice to use for a patio area.
If you would to like to find out more about our Indian Sandstone Paving Stones or Outdoor Porcelain Paving Slabs please contact one of our paving experts today.
Speak to a member of our friendly sales team today on 01482 688008 or Email sales@meltonstone.co.uk
-
 (32)From£34.09£23.86inc VAT Per M2In Stock - Immediate dispatch FREE Nationwide Delivery*
 -
 (19)From£34.32£23.86inc VAT Per M2In Stock - Immediate dispatch FREE Nationwide Delivery*
 -
 (10)From£34.09£23.86inc VAT Per M2In Stock - Immediate dispatch FREE Nationwide Delivery*
 -
 (15)From£33.50£23.86inc VAT Per M2In Stock - Immediate dispatch FREE Nationwide Delivery*
 -
 (9)From£65.00£24.99inc VAT Per M2In Stock - Immediate dispatch FREE Nationwide Delivery*
 -
 (8)From£33.50inc VAT Per M2In Stock - Immediate dispatch FREE Nationwide Delivery*
 -

 (3)From£34.09£23.86inc VAT Per M2In Stock - Immediate dispatch FREE Nationwide Delivery*
 -
 (14)From£33.50inc VAT Per M2In Stock - Immediate dispatch FREE Nationwide Delivery*
 -
 (9)From£27.05£23.41inc VAT Per M2In Stock - Immediate dispatch FREE Nationwide Delivery*
 -
 Out of StockFREE Nationwide Delivery*
600x900 Porcelain Paving
Are porcelain pavers heavy to lift?
Porcelain pavers can be heavy to lift due to their composition and size. The weight of porcelain pavers can vary depending on factors such as thickness, dimensions, and specific product characteristics. On average, porcelain pavers can range from around 40 to 60 pounds (18 to 27 kilograms) per square meter.
Here are a few considerations regarding the weight of porcelain pavers:
1. Thickness: Thicker porcelain pavers will generally be heavier than thinner ones. The weight increases as the thickness of the pavers increases. Common thicknesses for porcelain pavers range from 10mm to 20mm.
2. Size: Larger-sized porcelain pavers will typically be heavier than smaller ones. For example, a 600x600mm porcelain paver will generally weigh more than a 300x300mm paver.
3. Handling and Safety: It's important to exercise caution and use proper lifting techniques when handling heavy porcelain pavers. Here are some tips to help with lifting them safely:
- Use mechanical lifting aids or equipment when necessary, such as forklifts or pallet jacks, to minimize the strain on your body.
- If lifting manually, ensure you have a firm grip and use proper lifting techniques, such as bending your knees and using your leg muscles to lift the pavers, rather than straining your back.
- Seek assistance from others when needed, especially for larger or heavier pavers, to avoid overexertion or potential injury.
3. Professional Installation: Due to the weight and handling considerations of porcelain pavers, professional installation is often recommended. Experienced installers will have the necessary equipment and expertise to handle and lay the pavers safely and efficiently.
Before purchasing porcelain pavers, it's important to consider the weight and ensure that your project's requirements and your physical capabilities align with the pavers you choose. If you have concerns about the weight or lifting of the pavers, consulting with professionals or suppliers can provide further guidance and assistance based on your specific needs.
How do I clean outdoor porcelain tiles?
Cleaning porcelain tiles is relatively straightforward. Here's a step-by-step guide on how to clean porcelain tiles effectively:
1. Remove loose debris: Start by sweeping or vacuuming the surface of the tiles to remove any loose dirt, dust, or debris.
2. Prepare a cleaning solution: Mix a mild detergent or a pH-neutral tile cleaner with warm water in a bucket according to the manufacturer's instructions. Avoid using harsh or abrasive cleaners that can damage the porcelain surface.
3. Apply the cleaning solution: Dip a soft mop or microfiber cloth into the cleaning solution and wring out any excess liquid. Begin mopping the tiles, working in small sections at a time.
4. Scrub stubborn stains (if needed): For tougher stains or grime, use a soft brush or non-abrasive scrub pad to gently scrub the affected area. Be cautious not to use any abrasive materials or scrub too vigorously, as they may scratch the porcelain surface.
5. Rinse the tiles: Once you have cleaned the tiles, rinse them thoroughly with clean water to remove any remaining detergent residue. This step is essential to prevent the accumulation of residue that can dull the tile's appearance over time.
6. Dry the tiles: Wipe the tiles with a clean, dry microfiber cloth or allow them to air dry. Ensure the tiles are completely dry to prevent water spots or streaks.
7. Address grout lines: If your porcelain tiles have grout lines, it's important to keep them clean as well. Use a grout cleaner and a small brush to scrub the grout lines, following the product instructions.
Are porcelain tiles hard to cut?
Porcelain tiles can be harder to cut compared to some other tile materials due to their dense and durable nature. However, with the right tools and techniques, it is possible to cut porcelain tiles effectively. Here are a few methods commonly used to cut porcelain tiles:
1. Wet Tile Saw: A wet tile saw equipped with a diamond blade is the most common and recommended tool for cutting porcelain tiles. The wet tile saw uses water to cool the blade and reduce friction, making it easier to cut through the hard material. It allows for precise and clean cuts, including straight cuts, diagonal cuts, and notches.
2. Tile Nippers: Tile nippers are handheld tools with sharp jaws designed to break off small sections of tile. They are useful for making curved or irregular cuts on porcelain tiles. Tile nippers can be effective for trimming edges or creating rounded corners.
3. Tile Snap Cutter: A tile snap cutter, also known as a manual tile cutter, is a tool designed to score and snap tiles. It works well for straight cuts on porcelain tiles. The cutter has a scoring wheel that scores the surface of the tile, and then a snapping mechanism is used to break the tile along the scored line.
4. Angle Grinder: An angle grinder with a diamond blade can be used to cut porcelain tiles. This method is suitable for making straight cuts or shaping cuts on porcelain tiles. It is important to use a continuous rim or segmented diamond blade designed for cutting porcelain.
5. Diamond Hole Saw: If you need to make circular holes in porcelain tiles for plumbing or electrical purposes, a diamond hole saw can be used. These specialized drill bits are designed to cut through hard materials like porcelain.
When working with porcelain tiles, it's essential to wear safety goggles, gloves, and a dust mask to protect yourself from any flying debris or dust generated during the cutting process. It's also advisable to practice on extra tiles or scraps to become familiar with the tools and techniques before cutting the actual tiles for installation.
If you are unsure about cutting porcelain tiles or have a complex cutting requirement, it is recommended to consult with a professional tile installer or seek guidance from a knowledgeable source. They can provide specific recommendations based on your project needs.
How to remove grout stains from porcelain pavers?
To remove grout stains from porcelain pavers, you can follow these steps:
1. Prepare the area: Start by ensuring that the porcelain pavers are clean and free of any loose debris or dirt.
2. Protect the surrounding area: Before applying any cleaning solution, consider protecting the surrounding areas or adjacent surfaces to prevent accidental damage. You can use masking tape or plastic sheeting to cover nearby surfaces.
3. Select a grout stain remover: Choose an appropriate grout stain remover that is safe for use on porcelain. It's recommended to read the product label and follow the manufacturer's instructions for application and safety precautions.
4. Test in a small area: Before applying the grout stain remover to the entire stained area, perform a patch test in a small, inconspicuous area to ensure it does not cause any discoloration or damage to the porcelain pavers.
5. Apply the grout stain remover: Follow the instructions provided by the manufacturer for applying the grout stain remover. Typically, you will need to apply the solution directly onto the stained grout lines. Use a brush or sponge to work the solution into the grout, ensuring full coverage.
6. Allow the solution to dwell: Let the grout stain remover sit on the stained grout lines for the recommended period specified by the manufacturer. This allows the solution to penetrate and loosen the stain.
7. Agitate and scrub: After the dwell time, use a scrub brush or toothbrush to agitate the stained grout lines. Scrub in a circular motion to help dislodge the grout stain.
8. Rinse the area: Once you have scrubbed the stained grout lines, rinse the area thoroughly with clean water to remove the grout stain remover and any loosened residue. You may need to repeat this step multiple times to ensure all the residue is removed.
9. Dry and inspect: Allow the porcelain pavers to dry completely. Inspect the area to check if the grout stains have been fully removed. If necessary, repeat the process or try a different grout stain remover.
Note: It's important to follow the specific instructions and safety precautions provided by the grout stain remover manufacturer. Some products may require additional steps or precautions depending on their formulation.
If the grout stains are stubborn or cannot be fully removed using a grout stain remover, it is advisable to seek professional assistance or consult with a tile and grout cleaning specialist who can provide expert guidance and recommend alternative solutions.
What is a full mortar bed?
A full mortar bed refers to a method of installing tiles or pavers where a thick layer of mortar or mortar mix is applied to the substrate before setting the tiles. It involves creating a solid, even bed of mortar that supports the tiles and provides a stable surface for them to adhere to.
Here are the main steps involved in creating a full mortar bed installation:
1. Substrate Preparation: The substrate, which is the underlying surface where the tiles will be installed, should be clean, dry, and properly prepared. It may include materials like concrete, cement board, or a suitable tile underlayment.
2. Mortar Mix: Prepare a mortar mix by combining cement, sand, and water to achieve the desired consistency. The specific ratios and mix proportions may vary depending on the manufacturer's instructions or the requirements of the project.
3. Mortar Bed Application: Using a trowel or similar tool, apply the mortar mix to the substrate in a layer with a uniform thickness. The thickness of the mortar bed will depend on the specific tile or paver being installed and the recommendations of the manufacturer or industry standards.
4. Screeding: After applying the mortar bed, use a screed, which is typically a straightedge or screed board, to level and smooth the mortar. By dragging the screed across the surface, any excess mortar is removed, and the surface is made even.
5. Tile Setting: Once the mortar bed is prepared and levelled, the tiles or pavers are placed onto the mortar bed and pressed down firmly. The tiles should be set in a pattern or layout according to the desired design.
6. Grouting: After the tiles have been set and the mortar bed has cured sufficiently, the grout is applied to fill the gaps between the tiles. The grout is typically a mixture of cement, sand, and water, and it helps to secure the tiles in place and provide a finished look.
A full mortar bed installation is known for providing a solid and stable foundation for tiles or pavers. It can be particularly suitable for heavy or large-format tiles, areas subject to heavy loads or foot traffic, or when additional support and stability are required.
It's important to note that the specific installation methods and materials may vary depending on factors such as the type of tiles, the substrate, and local building codes. It is recommended to follow the manufacturer's instructions and consult with a professional tile installer for guidance on the best installation method for your specific project.
