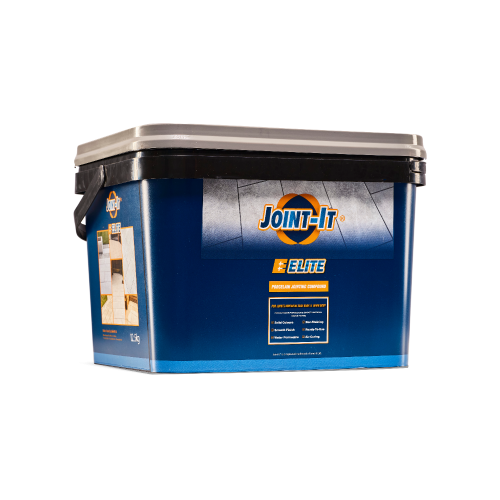
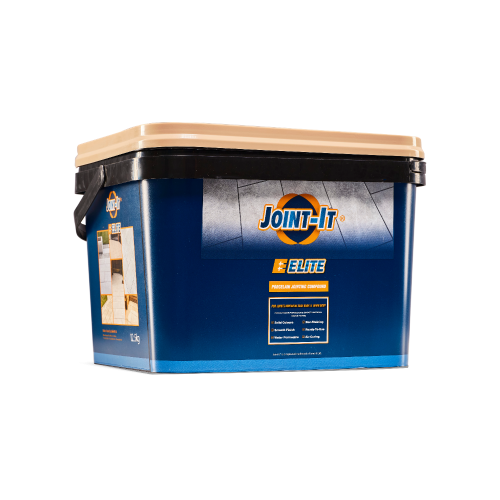
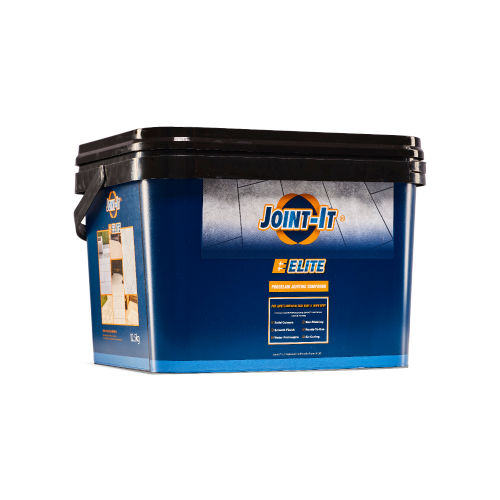
Porcelain Paving Grout
Paving grout comes in various finishes, colours and sizes.
When installing your outdoor garden patio area you must finish the job by filling the gaps in between the paving this is known as grouting/jointing.
There are different products to choose from when grouting your patio so please browse below to see which works best for your outdoor space.
There cement based grouts and liquid flowable grouts.
Speak to a member of our friendly sales team today on 01482 688008 or Email sales@meltonstone.co.uk
-
 £35.00+ VAT Each
 -
 £35.00+ VAT Each
 -
 £35.00+ VAT Each
Porcelain Paving Grout
Why is porcelain paving grout better than resin brush in grout?
Porcelain paving grout and resin brush-in grout are two different types of grout materials commonly used for paving applications. Each has its own advantages and considerations. Here are a few reasons why porcelain paving grout may be considered advantageous compared to resin brush-in grout:
1. Durability: Porcelain paving grout is typically more durable and resistant to wear and tear. It can withstand heavy foot traffic, vehicular traffic, and harsh weather conditions without significant deterioration. Resin brush-in grout, on the other hand, may be more prone to cracking or dislodging over time, particularly in high-traffic areas.
2. Stability: Porcelain paving grout provides greater stability and load-bearing capacity. It helps secure and stabilize the porcelain pavers, ensuring they remain in place and do not shift or move. Resin brush-in grout may have less structural strength and may not be as effective in maintaining the stability of the pavers.
3. Aesthetics: Porcelain paving grout can enhance the overall visual appearance of the paved area. It offers a clean and seamless look between the pavers, creating a consistent surface. Resin brush-in grout may result in a textured or pebbled appearance, which some may prefer for a more rustic or natural look.
4. Application flexibility: Porcelain paving grout can be used in various installation methods, including wet or dry installations. It can be applied in thicker joints and is compatible with different paving materials. Resin brush-in grout, on the other hand, is typically used for narrow joints, usually up to 6mm wide, and is more commonly associated with specific types of pavers, such as permeable or interlocking pavers.
5. Maintenance: Porcelain paving grout generally requires less maintenance. It is easier to clean and maintain over time, with stains or spills being easier to remove. Resin brush-in grout may require more frequent reapplication or touch-ups to maintain its appearance and integrity.
It's important to note that the suitability of grout material depends on various factors, including the specific project requirements, the type of paving material, and personal preferences. Consider consulting with professionals, such as manufacturers, suppliers, or experienced installers, who can provide guidance based on their expertise and knowledge of the specific grout options available for your project.
How to remove grout stains on porcelain pavers?
To remove grout stains on porcelain pavers, you can try the following methods:
1. Gentle scrubbing: Start by using a soft-bristle brush or a scrubbing pad with warm water. Gently scrub the stained areas of the porcelain pavers in circular motions. This can help loosen and remove surface grout stains.
2. pH-neutral cleaners: If the stains persist, you can use a pH-neutral cleaner specifically designed for porcelain surfaces. Dilute the cleaner according to the manufacturer's instructions and apply it to the stained areas. Allow the cleaner to sit for a few minutes to penetrate the stains, then scrub the area again with a brush or scrubbing pad. Rinse thoroughly with clean water.
3. Grout haze remover: If the stains are grout residue or haze left behind after grout installation, you can try using a grout haze remover. Follow the manufacturer's instructions and apply the haze remover to the stained areas. Allow it to dwell for the recommended time and then scrub the stains with a brush or scrubbing pad. Rinse thoroughly with clean water.
4. Vinegar or lemon juice: If the stains are light or surface-level, you can try using a solution of equal parts vinegar or lemon juice and water. Apply the solution to the stained areas, let it sit for a few minutes, and then scrub gently with a brush or scrubbing pad. Rinse thoroughly with clean water.
5. Commercial grout stain removers: There are commercial grout stain removers available on the market that are specifically formulated to remove grout stains. Follow the instructions provided by the manufacturer for the best results.
Always test any cleaning solution or method in a small, inconspicuous area first to ensure compatibility and to avoid potential damage to the porcelain pavers. Additionally, avoid using abrasive tools or cleaners that could scratch or damage the surface of the pavers.
If the stains persist or if you're uncertain about the best approach, consider consulting with professionals who have experience in cleaning and maintaining porcelain pavers. They can provide specific recommendations based on the type of stain and the characteristics of your pavers.
Does brick acid clean grout stains on porcelain slabs?
Brick acid, also known as muriatic acid or hydrochloric acid, is a strong and highly corrosive acid that is commonly used for cleaning masonry surfaces. While brick acid can effectively remove stains and residues from some types of grout, it is generally not recommended for use on porcelain slabs or other polished or glazed surfaces. Here's why:
1. Porcelain sensitivity: Porcelain slabs are often coated with a protective glaze or finish that gives them their characteristic appearance and makes them resistant to stains. Brick acid is highly acidic and can potentially damage or etch the surface of porcelain slabs, particularly if they have a polished or glazed finish. This can result in permanent damage and compromise the aesthetic appeal of the slabs.
2. Grout compatibility: While brick acid can be effective for removing certain types of grout stains, it may not be suitable for all types of grout. Some grout formulations may be more sensitive to acidic cleaners and can be damaged or discoloured by brick acid. It's essential to consider the specific characteristics and manufacturer's recommendations for the grout used with your porcelain slabs before applying any acid-based cleaners.
If you have stains on your porcelain slabs or grout, it's recommended to use alternative cleaning methods that are specifically designed for these surfaces. Here are a few options to consider:
1. pH-neutral cleaners: Opt for pH-neutral cleaners that are specifically formulated for use on porcelain surfaces. These cleaners are gentle and safe to use, while still effective at removing stains from both the porcelain slabs and grout. Follow the manufacturer's instructions for proper dilution and application.
2. Mild detergent and water: For regular cleaning or mild stains, a solution of mild detergent and warm water can often be sufficient. Apply the solution to the stained area, scrub gently with a soft brush or sponge, and rinse thoroughly with clean water.
3. Grout stain removers: There are specific grout stain removers available on the market that are designed to target and remove grout stains. These products are formulated to be safe for both the grout and the surrounding porcelain slabs. Follow the instructions provided by the manufacturer for the best results.
It's important to always test any cleaning solution or method in a small, inconspicuous area first to ensure compatibility and to avoid potential damage to the porcelain slabs or grout. If you have concerns or are uncertain about the best approach, consider consulting with professionals who have experience in cleaning and maintaining porcelain surfaces.
How thick do I mix porcelain paving grout?
When mixing grout for porcelain paving, the specific thickness or consistency of the grout mix can vary depending on the manufacturer's instructions and the desired application. However, as a general guideline, the consistency of the grout mix for porcelain paving is typically similar to a smooth, thick paste.
To achieve the appropriate thickness for porcelain paving grout, follow these general steps:
1. Read the instructions: Start by reading the manufacturer's instructions provided with the grout product you are using. Different grout manufacturers may have specific guidelines and recommendations for the proper consistency of the grout mix.
2. Gradually add water to the dry mix: Begin by adding water to the dry grout mix in a clean container or bucket. Follow the manufacturer's instructions for the water-to-grout mix ratio. It's generally recommended to add water gradually to achieve the desired consistency, as it's easier to add more water if needed than to correct an overly watery mix.
3. Mix thoroughly: Use a mixing paddle or a low-speed drill fitted with a mixing attachment to thoroughly mix the grout and water together. Ensure that all the dry grout powder is incorporated and mixed evenly with the water. Mix until you achieve a smooth, lump-free consistency.
4. Check the consistency: As you mix the grout, periodically check the consistency to ensure it is neither too thick nor too thin. The grout should be thick enough to hold its shape without excessive sagging or running off a trowel.
5. Allow the mix to slake (if required): Some grout products may require a slaking period, which is a short rest period after initial mixing. This allows the grout to fully hydrate before final mixing. Refer to the manufacturer's instructions to determine if slaking is necessary for the specific grout you are using.
Remember, the specific instructions and water-to-grout mix ratio may vary depending on the manufacturer and product. Always refer to the manufacturer's guidelines and instructions for the specific grout product you are using to ensure the proper mixing process.
If you have any uncertainties or questions, it's recommended to consult with the grout manufacturer or a professional installer for guidance specific to your project and the grout product you are using.
Does pressure washing break up porcelain paving grout?
Pressure washing can potentially damage or dislodge the grout between porcelain paving if not done carefully. Porcelain paving grout is generally durable and resistant to normal cleaning methods, but excessive or improper use of pressure washing equipment can cause problems. Here are some considerations:
1. Water pressure: High-pressure water can be effective for cleaning porcelain paving, but using excessive pressure can dislodge or damage the grout. It's important to adjust the pressure to a suitable level and avoid directing the stream of water directly at the grout joints.
2. Nozzle selection: Choosing the right nozzle for your pressure washer is crucial. Opt for a wider spray pattern nozzle, such as a fan or rotary nozzle, to distribute the water pressure more evenly and reduce the impact on the grout.
3. Angle and distance: Maintain a safe distance from the surface and use an angle that directs the water away from the grout joints. This helps minimize the direct impact of high-pressure water on the grout, reducing the risk of damage.
4. Test in a small area: Before pressure washing the entire surface, test a small, inconspicuous area to ensure that the pressure and technique are suitable and do not cause any harm to the grout.
5. Protective measures: Consider using protective measures, such as covering the grout joints with plastic or tape, to shield them from direct pressure or debris during the pressure washing process.
6. Sealant considerations: If the porcelain paving has been sealed, check the sealant manufacturer's recommendations regarding pressure washing. Some sealants may be more susceptible to damage from high-pressure water, so it's important to follow the specific instructions provided.
Ultimately, it's crucial to exercise caution and use proper technique when pressure washing porcelain paving to avoid damaging the grout. If you're uncertain or have concerns about pressure washing, consider consulting with professionals who have experience in cleaning and maintaining porcelain paving.
Can I install outdoor tile grout in the sun?
Installing outdoor tile grout in direct sunlight is generally not recommended, as it can negatively impact the grout's performance and result in suboptimal results. Here's why:
1. Accelerated drying: Direct sunlight can cause the grout to dry too quickly, which can lead to poor adhesion and weak bonding. Rapid drying can also increase the risk of cracking, shrinking, or uneven curing of the grout.
2. Difficult application: Working with grout in direct sunlight can be challenging because it can dry out too fast, making it difficult to properly fill the joints and achieve a smooth, consistent finish. This can result in an uneven or inadequate grout installation.
3. Reduced workability: Exposing grout to direct sunlight can significantly reduce its workable time. The grout may become too stiff or difficult to manipulate, making it challenging to properly apply and finish.
To ensure a successful grout installation, it's generally recommended to work in shaded or cool areas, especially when working with outdoor tile grout. Here are a few tips to consider:
1. Plan your work schedule: Choose a time of day when the area you're working on is shaded or when the sun is less intense. Early mornings, late afternoons, or cloudy days can be better options for grout installation.
2. Create shade: If working in a sunny area is unavoidable, consider using temporary shading techniques, such as erecting a canopy or using large umbrellas, to provide shade over the work area.
3. Keep materials cool: Store the grout and other materials in a shaded area or in a cool environment before use. This can help maintain their workable consistency for a longer duration.
4. Mist the surface: If you're concerned about the grout drying too quickly, lightly misting the tile surface with water can help slow down the drying process and provide a better environment for grout application.
Always refer to the manufacturer's guidelines and instructions for the specific grout product you are using, as they may provide specific recommendations regarding temperature and sunlight exposure during installation. Following these guidelines will help ensure a successful grout installation and maximize the performance and longevity of your outdoor tile project.
